Totem Board Support package released

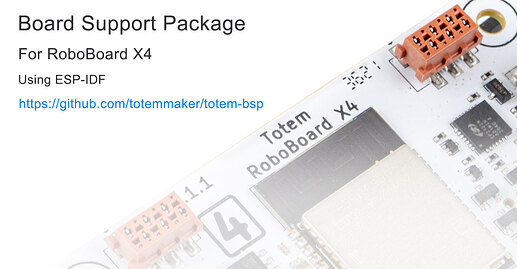
Announcing release of totem-bsp. This GitHub repository contains a set of libraries (components) to use RoboBoard X4 with barebone ESP-IDF project, an official Espressif way to develop ESP32 applications. esp-idf is an actively developing framework, featuring latest funcionality and full control of Espressif SoC.

While using this framework is quite steep learning curve for beginners - every ESP32 supported application (like Arduino or Micropython) is built upon it, so everyone are using it, sometimes without even knowing it.

By using board support package - RoboBoard X4 can be integrated into virtually any popular framework or used for advanced projects with maximum flexibility. You can focus on you application without a need to tinker with each pin or integrated circuits.

This is initial release. More features, documentation and integration to Arduino will come later.
1 Like

X4 software update. Early access

Been working on software improvements for RoboBoard X4.
Until full integration, documenation and examples are released, providing a way to test these updates for most impatient ones.

New version of totem-bsp package includes support for all RoboBoard X4 features and can be used as Arduino IDE or PlatformIO library. Now you can compile project with latest (2.0.7) ESP32 Arduino core version.

Installing totem-bsp library

Arduino IDE

  1. Download ZIP file: totem-bsp-master.zip
  2. Install trough Sketch → Include Library → Add .ZIP Library…
  3. Inside sketch include totem-bsp library:
#include "totem-bsp.h"
void setup() {
//  X4_enableAppControl(); // Uncomment to enable Totem App connect
}
void loop() {
  X4.led.toggle();
  delay(100);
}
  1. Use default configuration:
    image

PlatformIO

  1. Create new PlatformIO project with Espressif ESP32 Dev Module.
  2. Inside platformio.ini include link to totem-bsp library:
[env:esp32dev]
platform = espressif32
board = esp32dev
framework = arduino
lib_deps = https://github.com/totemmaker/totem-bsp
  1. Inside main.cpp include totem-bsp library:
#include <Arduino.h>
#include "totem-bsp.h"
void setup() {
//  X4_enableAppControl(); // Uncomment to enable Totem App connect
}
void loop() {
  X4.led.toggle();
  delay(100);
}

Documentation

While official documentation is getting done - you can find available functions inside header files:

See new changes

Update of X4 API. More refined and includes some conveniences

  • X4.button.isLongPress() to detect long press.
  • X4.button.waitPress() delay until button is pressed.
  • Events now include value as parameter:
void eventButton(int state) {
  Serial.println(state ? "Button press" : "Button release");
}
void eventFunctionA(int value) {
  Serial.print("Value from Totem App: ");
  Serial.println(value);
}
void setup() {
  Serial.begin(115200);
  X4.button.addEvent(eventButton);
  X4.functionA.addEvent(eventFunctionA);
}
  • More explanatory rgb color function names (color is removed):
    • X4.rgb.color(255, 255, 255, 255) → X4.rgb.colorARGB(255, 255, 255, 255)
    • X4.rgb.color(255, 255, 255) → X4.rgb.colorRGB(255, 255, 255)
    • X4.rgb.color(255, 0x0) → X4.rgb.colorAHEX(255, 0x0)
    • X4.rgb.color(0x0) → X4.rgb.colorHEX(0x0)
  • Color names. More available in ColorList.h
    • X4.rgb.colorHEX(Color::Orange)
    • X4.rgb.colorHEX(Color::Green)
    • X4.rgb.colorHEX(Color::Lime)
  • Access channel with index instead of name.
    Now calling X4.rgbA.on() can be done with X4.rgb[0].on().
    Convenient to use inside loops:
for (int i=0; i<4; i++) {
  X4.rgb[i].colorRGB(rand(), rand(), rand());
}

Old naming X4.rgbA is still available. Going out of index X4.rgb[5] is safe and won’t crash application.

Added accelerometer and gyroscope support

  • Now you can read MEMS (renamed to IMU) sensor without additional libraries. Just use included API and it works on both (1.0 and 1.1) board versions.
void loop() {
  // Read IMU data and store to variable
  auto imu = X4.imu.read();
  // Print IMU data
  Serial.printf("accel: X:% .2f Y:% .2f Z:% .2f, gyro: X:% 4.0f Y:% 4.0f Z:% 4.0f, temp: %2.2fC\n",
    imu.getX_G(), imu.getY_G(), imu.getZ_G(),
    imu.getX_dps(), imu.getY_dps(), imu.getZ_dps(),
    imu.getTempC()
  );
  delay(100);
}

output:

accel: X:-0.01 Y: 0.03 Z: 1.01, gyro: X:   0 Y:   2 Z:  -0, temp: 42.53C
accel: X:-0.01 Y: 0.03 Z: 1.01, gyro: X:   1 Y:   2 Z:  -0, temp: 42.77C
accel: X:-0.01 Y: 0.03 Z: 1.01, gyro: X:   0 Y:   2 Z:  -0, temp: 42.53C
accel: X:-0.01 Y: 0.03 Z: 1.02, gyro: X:   1 Y:   2 Z:  -0, temp: 42.67C
accel: X:-0.01 Y: 0.03 Z: 1.02, gyro: X:   1 Y:   2 Z:  -0, temp: 42.63C
accel: X:-0.01 Y: 0.03 Z: 1.02, gyro: X:   1 Y:   2 Z:  -0, temp: 42.53C
  • Available measurement units:
// Accelerometer. Measures acceleration
float getX_G(); // X G. Gravitational force
float getX_mss(); // X m/s^2. Acceleration in meters per second squared
// Gyroscope. Measures rotation speed
float getX_dps(); // X dps. Degrees per second
float getX_rads(); // X rad/s. Radians per second
float getX_rpm(); // X RPM. Rounds per minute
// IMU sensor internal temperature
float getTempC(); // Celsius
float getTempF(); // Fahrenheit
// orientation (accelerometer based).
float getOrientX(); // X axis [-180:180] degree
float getOrientY(); // Y axis [-180:180] degree
float getRoll(); // roll estimation. [-180:180] degree
float getPitch(); // pitch estimation. [-90:90] degree

TotemBUS (TBUS) improvements

  • Sensor data update happens automatically in background and Arduino code only reads cached value, resulting in zero latency code. Data update rate is as fast as module is capable to.
  • Removed subscribe module.event() function. This functionality now works automatically and manual control is no more required.
  • Improved events API. Different modules can be handled in a single function.
Module22 m22;
Module15 m15;
void eventModule(int evt) {
  if (evt == Module22::evtTemp) Serial.println(m22.getTempC());
  if (evt == Module15::evtButtonA) Serial.println("Button A press");
  if (evt == Module15::evtButtonB) Serial.println("Button B press");
}
void setup() {
  Serial.begin(115200);
  m22.addEvent(eventModule);
  m15.addEvent(eventModule);
  m22.getTempC(); // Get value and register event
  m15.getButtonA(); // Get value and register event
  m15.getButtonB(); // Get value and register event
}
  • Improved modules control API. Instead of sophisticated commands a simple ones used:
    • m11.distance.getMM() → m11.getMM()
    • m14.pos.get() → m14.getPos()
    • m14.color.get() → m14.getColor()
    • m15.knobA.get() → m15.getKnobA()
    • m15.buttonA.isPressed() → m15.getButtonA()
    • m22.colorR.get() → m22.getColorR()
    • m22.IR.get() → m22.getIR()
    • m22.humidity.get() → m22.getHumidity()
    • m22.temp.getC() → m22.getTempC()
    • and more…

Scan I2C modules

  • A simple code to scan for connected Qwiic / Stemma QT modules:
void eventFoundI2C(int addr) {
  // Ignore internal IMU sensor
  if (addr == X4.imu.getI2CAddr()) return;
  Serial.print("Found: ");
  Serial.println(addr, HEX);
}
void loop() {
  Serial.println("Scan...");
  X4.qwiic.scan(eventFoundI2C);
}

Update v1.2.0

This version brings some internal changes and one new feature - Robot class.

As we already familiar with X4 object, allowing to access board features (like X4.dc, X4.servo, …), but this only provides basic control for motors. While it’s easy to apply power, a more sophisticated motor control logic is required when building a robot. It has to be steered to certain direction and should act predictably on user input. This is also gets more complicated depending on drivetrain used (steering, tank, mecanum wheels).

A Robot object comes into help to properly drive your robot. It implements algorithms for most popular wheel bases. All you need to to is simply specify motors to use and direction to go. Rest is taken care by RoboBoard!

See a few examples:

Steer drive

#include "totem-bsp.h"
#include "PS4Controller.h"

void setup() {
  // Connect PS controller
  PS4.begin("01:02:03:04:05:06");
  // Configure motors used to drive wheels
  Robot.config.left.setMotor(X4.dcA); // Set left wheel to DC port A
  Robot.config.right.setMotor(X4.dcB); // Set right wheel to DC port B
  Robot.config.setDriveSteer(); // Use steer drive logic
  // Configure steering servo (port A) limits (left, center, right)
  Robot.config.servo[0].setRange(5, 33, 75);
}

void loop() {
  // Wait for PS controller to connect
  if (!PS4.isConnected()) return;
  // Control drive direction using left and right joysticks
  Robot.joystickDrive(PS4.LStickY(), PS4.RStickX());
}

Tank drive

#include "totem-bsp.h"
#include "PS4Controller.h"

void setup() {
  // Connect PS controller
  PS4.begin("01:02:03:04:05:06");
  // Configure motors used to drive wheels
  Robot.config.left.setMotor(X4.dcA); // Set wheel to DC port A
  Robot.config.right.setMotor(X4.dcB, true); // Set wheel to DC port B (invert)
  Robot.config.setTurnPowerLow(60); // Lower turn power (more precision)
  Robot.config.setDriveTank(); // Use tank drive logic
}

void loop() {
  // Wait for PS controller to connect
  if (!PS4.isConnected()) return;
  // Control drive direction using left and right joysticks
  Robot.joystickDrive(PS4.LStickY(), PS4.RStickX());
  // Or use joysticks to control tracks individually
  // Robot.left.joystickSpin(PS4.LStickY());
  // Robot.right.joystickSpin(PS4.RStickY());
}

Mecanum drive

#include "totem-bsp.h"
#include "PS4Controller.h"

void setup() {
  // Connect PS controller
  PS4.begin("01:02:03:04:05:06");
  // Configure motors used to drive wheels
  Robot.config.left.front.setMotor(X4.dcA, true); // Set wheel to port A (invert)
  Robot.config.right.front.setMotor(X4.dcB, true); // Set wheel to port B (invert)
  Robot.config.left.rear.setMotor(X4.dcC, true); // Set wheel to port C (invert)
  Robot.config.right.rear.setMotor(X4.dcD, true); // Set wheel to port D (invert)
  Robot.config.setTurnPowerLow(60); // Lower turn power (more precision)
  Robot.config.setAutobrake(true); // Brake wheels when power set to 0
  Robot.config.setDriveMecanum(); // Use mecanum drive logic
}

void loop() {
  // Wait for PS controller to connect
  if (!PS4.isConnected()) return;
  // Control drive direction using left and right joysticks
  Robot.joystickDrive(PS4.LStickY(), PS4.RStickX(), PS4.LStickX());
}

Robot class also in control of robot “appearance” (replaces X4.config) and contains additional functionality (with many more to come).
Official documentation will be available when all planned features are implemented.